9 Steps To Building A Koi Pond Oasis
With around 270 sunny days out of the year, Costa Mesa is the perfect place for building koi ponds. This leaves you a lot of time to get outside and enjoy your koi pond. But first, it needs to be built.
Bestplaces.net has Sperlings Comfort Index putting Costa Mesa’s climate at an 88/100 (54 is the US average).
Building a koi pond in your backyard is like installing an addition to your home.
It’s a pretty big project, but it can be a fun one. The amount of time and effort needed can definitely be worth it when you see your awesome new koi pond oasis. As for the process, we broke it down into 9 steps for you:
- Plan your backyard koi pond
- Dig out the area
- Install the pond equipment
- Lay down the liner
- Add rocks and gravel
- Install any additions
- Fill your pond with water
- Clean the area
- Enjoy your newly built koi pond
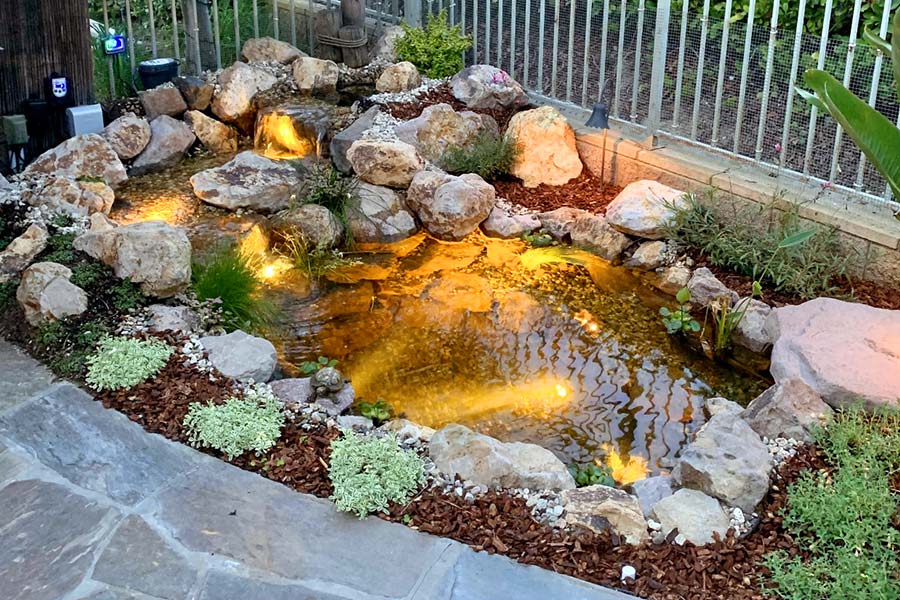
For this post, let’s assume you’re building a brand new 10′ x 15′ fish pond with a waterfall but no stream (like the one below). Let’s look at the process of constructing a backyard fish pond in Costa Mesa!
You can also find out about the pondless water feature option >>
1. Planning Your Koi Pond
Choosing the right place for your koi pond can take some finesse. Some placement tips to keep in mind include:
- Placing it where you can see your pond from inside and outside your house
- Outline the area with spray paint

2. Dig Your Koi Pond Out
You should keep these in mind when digging your koi pond out:
- Dig down about 12″ for the first shelf
- this is where marginal plants can be placed
- make it at least 1′ wide
- The rest of the area should be 24″ deep
- Digging can be difficult because even though you only have to dig 24″ that’s where the majority of tree roots are.
This stage and the next happen separately but at the same time.
Renting a backhoe to dig can be very helpful, check for rental places in Costa Mesa.

3. Place Your Koi Pond Equipment
The biological and mechanical filters are ‘set’ during the digging process. You need the correct height and pitch of both filters so they work correctly once the pond is running.
This can include any other filtration add-ons you would like.
The filters are a biofalls and skimmer, both which help clean the water.
4. Laying Down The Liner
First goes the underlayment. This helps protect the liner from tears.
The liner itself helps keep water in the pond and out of your yard. Laying it incorrectly or damaging it can cause your yard to become part of the pond instead of the other way around.
Liner installation usually takes a while since it has to precisely attach to the skimmer and filter.
Some tips to keep in mind when laying the pond liner are to:
- Use 45 mil EPDM liner (more expensive but it’s extremely durable)
- Extend it over the pond edge by 1′
- Anchor it down with large rocks
- Make sure it’s smooth as possible
- Extend the liner behind your waterfall
Next comes a great touch that can make your koi pond look and function better.
5. Add Rocks And Gravel To The Koi Pond Bottom
Rock your pond like The Rolling Stones!
Once the liner is down, the pond must be “rocked out”, meaning cover it with rocks and gravel. This makes for a more natural look, much better than looking at a plain black bottom.
Keep these in mind when rocking out your koi pond:
- Start with large stones first
- Place edge stones first on the top and shelf to hold the liner down
- Use normal rocks, not colored or decorative ones
- The bottom and sides need smoother stones so your koi won’t hurt themselves
It can make the bottom of your pond look amazing:

6. Add Any Additions
Any add-ons usually mean more time, but it’s worth it because it can make your pond even better! This includes making it look and/or function better, meaning less maintenance for you.
These koi pond additions can include:
- Underwater LED lights
- Autofill line
- IonGen
- Aerators

7. Fill In Your Koi Pond With Water
Let the water flow on in and start seeing the end of the project!
You’ll want to prepare the water for your koi fish. This can take a couple weeks as you will want to make sure your pond retains water and that it’s good for fish.
8. Clean The Area
It may be the worst part of the project, but it’s one of the most important. After everything is clean and put away you can look at your completed project without stress or worry.
You’ll also want to run the water and make sure it clears up.

9. Finishing Touches
Once everything is working properly and the water is ready, add some life!
You can add your koi fish, some of the many types of aquatic plants, and almost anything else you may want. After everything’s added you can begin to fully enjoy your newly built backyard koi pond.
Will You Build Your Own Koi Pond?
Not everyone can install their own koi pond. It can take more time, manpower, and knowledge than most people have. If you are able to do it on your own, leave us a picture in the comments!
You can learn more about our new koi pond construction >>